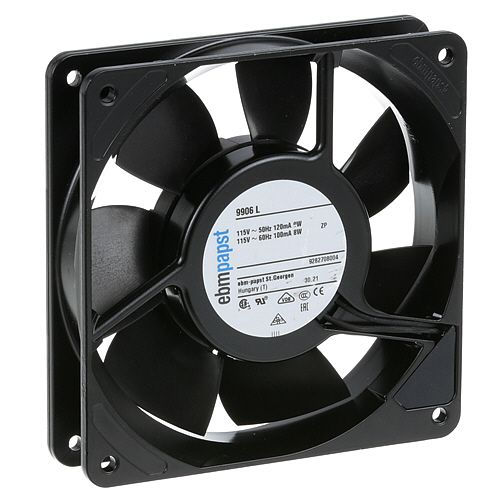
How to Properly Clean and Maintain a Kitchen Exhaust Fan
The kitchen exhaust fan is an important appliance for a safe, efficient, and pleasant cooking environment. Its main function is to draw out smoke, heat, and odors created in cooking so that they do not permeate the rest of your home. Especially in kitchens where frying, grilling, or broiling is done, these activities generate substantial smoke and grease.
Many homeowners fail to address the needs of this important equipment, which can lead to poor performance and may raise safety concerns. In addition to maintaining the efficiency of the exhaust system, regular cleaning prolongs its lifespan and saves on replacement costs, ensuring that your kitchen remains a safe and pleasant place. In this article, we will describe the components of your exhaust system, explain why you need to clean it regularly, provide a detailed step-by-step guide on how to clean it properly, and offer tips on its maintenance as well as how to troubleshoot various problems.
| Table Of Contents: Understanding Your Kitchen Exhaust System Why Regular Cleaning is Essential Tools and Materials Needed Step-by-Step Cleaning Guide Maintenance Tips For Exhaust Systems |
Understanding Your Kitchen Exhaust System
A kitchen exhaust system is essential for maintaining indoor air quality, removing heat, smoke, and odors produced during cooking. Knowing the key components and their functions helps ensure optimal performance and simplify routine maintenance.
|
Component |
Description |
Functionality |
|
Extractor hood |
|
|
|
Hood filters |
|
|
|
Fan unit |
|
|
|
Ductwork |
|
|
Why Regular Cleaning is Essential
Multiple adverse effects can occur if you neglect to clean your kitchen exhaust fan, including both safety and efficiency.
-
Fire hazards: Grease buildup is a major fire risk. Kitchen cleaning is crucial, as an estimated 49 percent of home structure fires involve the cooking equipment, according to the National Fire Protection Association (NFPA).
-
Indoor air quality decline: Contaminated air can be circulated by a dirty exhaust fan, and this can have a severe impact on the air quality you breathe. Respiratory problems are caused by this for you and your family, and will exacerbate conditions such as asthma.
-
Increased energy consumption: A needful or inefficient fan requires further exertion to perform a task, resulting in a high energy bill. With all of these inefficiencies mounting up over time, you can end up spending much more on your energy costs overall.
-
Regulatory compliance: In some areas, the failure to maintain your exhaust system may be in breach of local health and safety regulations.
-
Prolonged lifespan: Cleaning and maintenance of your kitchen exhaust fan can prolong its life. Allowing the equipment to function as intended saves you replacement costs and reduces downtime in your cooking preparation.
-
Odor control: Grease can also accumulate odors from food, and if this grease is retained around the kitchen, the smell can linger and ruin the fragrance of fresh meals being made, leaving a negative impression on the dining experience.
From one cooking to another, you are assisting in the wear and tear of the exhaust system. Maintenance is a very important factor of safety when it comes to a healthy and safe environment to cook.
Tools and Materials Needed
Gather the following tools and materials before starting the cleaning process to ensure the process is smooth and effective:
Safety gear
-
Gloves: Prevent hands from being greasy and from cleaning agents.
-
Goggles: Prevent chemicals and debris from entering shielded eyes.
Cleaning agents
-
Degreasers: Cuts through grease effectively, which is necessary for cleaning filters and inside the exhaust unit.
-
Dish soap: Gentle and effective for general cleaning without harsh chemicals.
-
Baking soda: Natural deodorizer and gentle abrasive that can work to scrub away even the most stuck-on grime.
Cleaning tools:
-
Brushes: Various sizes of soft or stiff kitchen brushes are good for cleaning in tight spots and scrubbing filters.
-
Microfiber cloths: Wiping and polishing surfaces without scratching them is ideal.
-
Buckets: To mix cleaning solutions and soak filters.
Additional tools:
-
Screwdriver set: It may be necessary to remove any screws holding the fan or filter in place.
-
Vacuum with brush attachment: Contributes to removing dust and grease from ducting and difficult-to-access places.
-
Ladder: If your exhaust unit is high, you may need to use a ladder to reach the fan and hood properly.
Having the right tools will make the process of cleaning easier and more effective, as you will be able to clean every part of your exhaust system.
Step-by-Step Cleaning Guide
Preparation
-
Turn off and unplug the exhaust fan: Before starting any cleaning, ensure safety by disconnecting the fan from its power source. This helps prevent accidents or electrocution.
-
Ensure the stovetop is cool: Wait until all surfaces and appliances are cool to avoid burns or accidents during the cleaning process.
Cleaning the hood filters
The hood filters are one of the most crucial parts of the exhaust system, as they trap much of the grease and grime.
-
Remove filters carefully: Detach the filters according to the manufacturer’s instructions. Take care not to bend or damage them.
-
Soak in a cleaning solution: Mix hot water with dish soap and baking soda in a bucket, creating a submersion solution. Soak filters for 15-30 minutes to loosen grease.
-
Scrub gently: Use a brush or sponge to clean filters. Ensure you scrub all areas effectively, focusing on corners and crevices.
-
Rinse thoroughly and dry: Rinse under hot water until all soap and residues are gone. Allow to dry completely to prevent moisture buildup when reinstalled.
-
Inspect filters for damage: While cleaning, check for signs of wear or damage. If filters are bent, corroded, or heavily clogged beyond cleaning, consider replacement.
Cleaning the fan unit
-
Access the fan blades: Take off any protective covers or barriers to expose the fan blades that are accessible for cleaning.
-
Wipe down with degreaser: Gently apply a degreaser to all blades and surfaces. For best results, allow the degreaser to sit for a few moments.
-
Remove accumulated grease and debris: Take care in any crevices or joints where grease could be trapped. Brushes may be needed to fit into tight areas.
-
Lubricate moving parts: Moving parts should be lubricated if the manufacturer’s instructions allow, to ensure that they operate smoothly after cleaning.
Cleaning the ductwork
-
Inspect for visible grease buildup: Accessible panel openings should be used to look inside ducts for any signs of accumulation. It requires immediate action if a buildup is apparent.
-
Vacuum using a brush attachment: But for those places that are tradable, proceed to vacuum up any loose debris and visible grease.
-
Seal ducts properly: Once cleaned, it is important to seal the ducts with proper materials to ensure outdoor contaminants do not enter your home.
-
Test the exhaust fan: Turn on the exhaust fan to check proper operation once everything is back in place. Check and listen for any unusual noises or issues.
-
Check performance: After the fan is running, check if it is drawing air well and making a smooth sound.
Maintenance Tips For Exhaust Systems
It is important to establish a regular cleaning schedule for your kitchen exhaust fan to prolong its life and save you time and money in the long run. Here are some guidelines:
-
Regular cleaning schedule: Heavy users should aim for monthly cleaning; lighter users should aim for quarterly cleaning. Make sure you remember significant cleaning dates by marking your calendar.
-
Replace filters as recommended: Replace the filter according to the manufacturer's guidelines. Metal filters tend to be cleaned and reused, while charcoal filters will need to be replaced every 6 months to a year, depending on usage.
-
Keep a Maintenance Log: Note down your cleaning schedule, i.e., when you cleaned and when you replaced something, to track the performance over time. This log can be very useful in determining trends and when major maintenance might be due.
How to Address Common Cleaning Challenges in a Commercial Kitchen
Keeping a clean kitchen exhaust fan is essential for a safe and effective cooking environment. Besides mitigating fire risk, proactive cleaning also helps enhance indoor air quality and prolong the life of the equipment. You should clean your pipe regularly. By establishing cleaning schedules, using the proper tools and methods, and keeping an eye on the fan’s functioning, it is possible to maintain your kitchen in good working order. Regular maintenance of your kitchen exhaust fan creates a more pleasant cooking experience and contributes to a healthier kitchen. PartsFe UK stocks a wide range of high-quality Electrical & Hardware Parts designed for durability and performance across various applications. The selection includes fan blades, seals, cooling fans, exhaust fans, and many more essential components.
FAQs
How often should I clean my kitchen exhaust fan?
It’s recommended to clean your exhaust fan at least once a month if you cook frequently and quarterly for lighter cooking applications. Establishing this routine can significantly reduce grease buildup and enhance safety.
Can I clean the ductwork myself?
While minor buildups can be tackled by using a hose vacuum or brush, extensive grease accumulation in ductwork should be left to professionals. They possess the specialized tools and knowledge to conduct a thorough cleaning while ensuring compliance with safety regulations.

