How to Choose the Right Control Knobs for Your Commercial Kitchen Equipment
In a busy commercial kitchen, the humble control knob does far more than turn heat on and off. It is the tactile link between chef and machine, the point where judgement meets engineering. Choose well, and your ovens, grills, and warmers will respond with repeatable precision. The right control knobs improve safety, enhance accuracy, and withstand relentless cleaning and high ambient heat. They also reduce training time, with clear markings and ergonomic shapes that feel intuitive even during a rush. From thermostat and gas valve knobs to specialised pointers and fluted designs, there is a world of difference hidden in materials, shaft types, and mounting methods. This guide explains what to look for, how to match knobs to your equipment, and how to maintain them. Get the details right, and your kitchen runs smoother and faster.
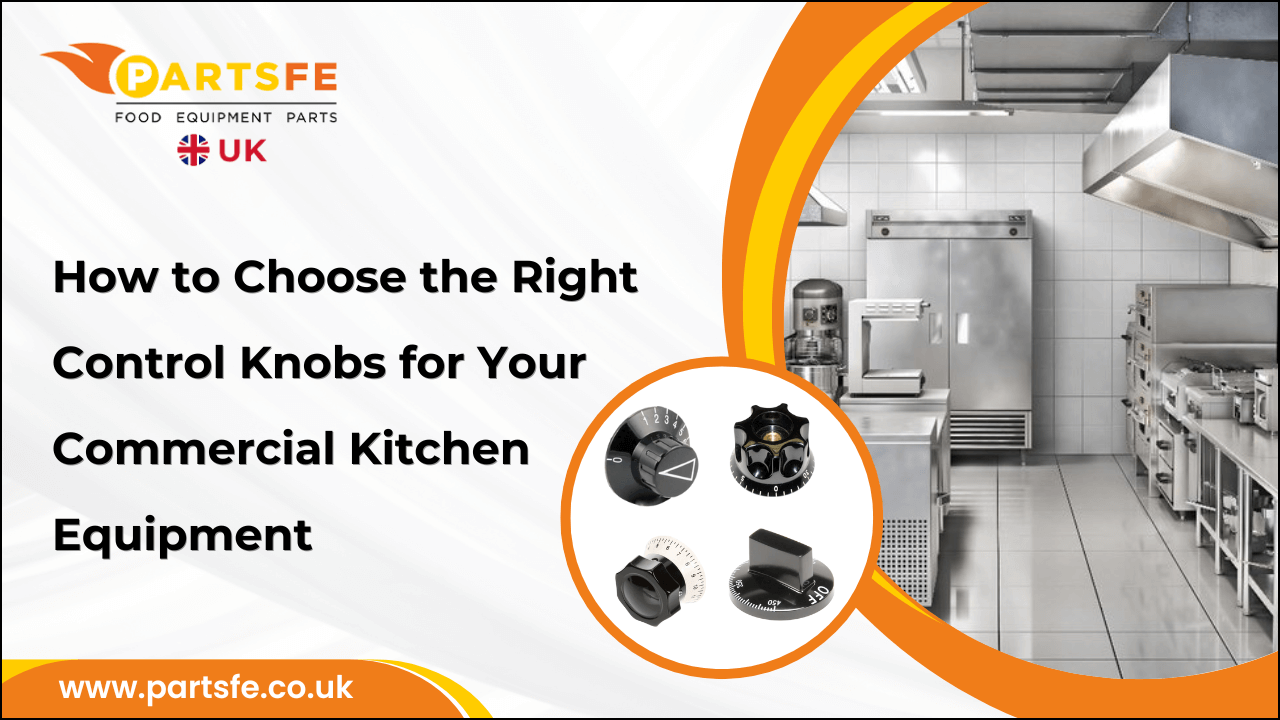
Understanding Different Types of Commercial Kitchen Control Knobs
Commercial kitchens rely on a range of control knobs, each engineered for a specific job. While they may look similar, the internal interface, heat tolerance, and indication style vary widely. Choosing the correct type optimises performance and reduces the risk of mis-setting temperatures in the heat of service.
-
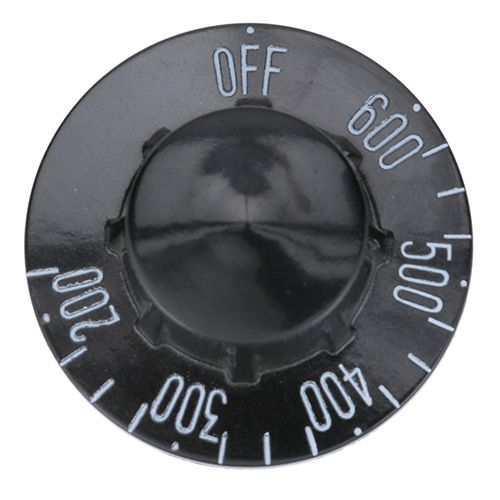
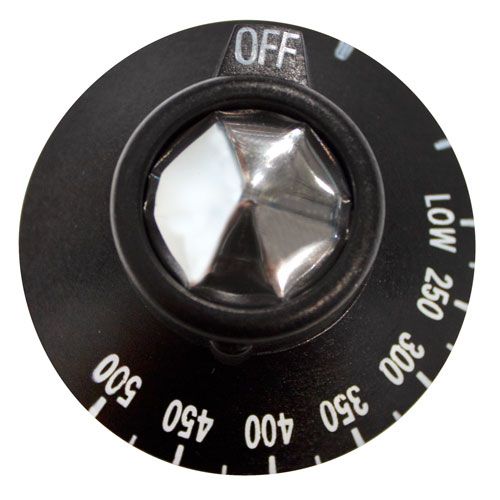
Thermostat control knob: This regulates temperature precisely by interfacing with the appliance’s thermostat spindle. A quality thermostat knob presents clear graduations (e.g., 50–300°C) and a positive stop at minimum and maximum.
-
Gas valve knob: Fitted to stoves, ovens, chargrills, and some fryers, the gas valve knob modulates gas flow. Safety‑forward variants use push‑to‑turn and spring return from ignition to prevent accidental opening. Detents at “Off,” “Pilot,” “Ignite,” and “High/Low” improve certainty by feel.
-
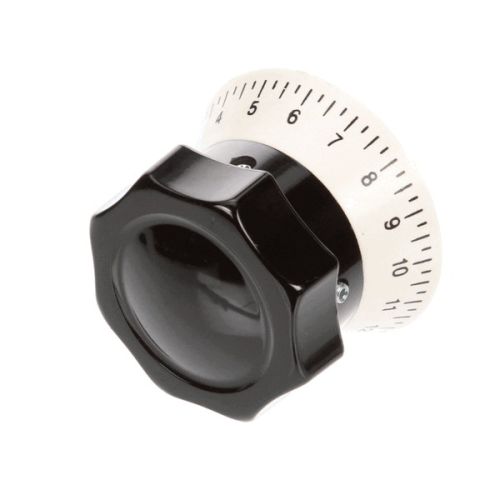
Pointer knob: A pointer knob offers precise alignment via a clear arrow or index line. It’s ideal when the scale lives on the control panel and the knob needs to indicate position at a glance.
-
Fluted knob: With scalloped sides for grip, a fluted knob provides excellent purchase even with damp or gloved hands. It balances ergonomics with aesthetics, common on front‑of‑house or open‑kitchen kits where appearance matters.
In high‑demand kitchens, consider colour‑coded caps or rings (e.g., blue for cool zones, red for high heat, and green for low‑energy settings). This supports quick visual checks and reduces errors during peak periods.
Choosing the Right Oven Control Knobs
The correct knob ensures faithful translation of your setting to the oven’s actual behaviour. Quality oven knobs deliver a firm, non‑sloppy fit to the thermostat spindle, so movement at your fingertips equals movement at the sensor. Look for:
-
Positive indexing and a clear pointer that aligns reliably with the panel scale.
-
Distinct low‑temperature markings for proofing and gentle cooking (e.g., 50–120°C) as well as high‑temperature zones for roasting and baking.
-
A skirt designed to shield the spindle from splash and facilitate cleaning without forcing water into the control cavity.
-
The oven temperature knob also affects how quickly chefs can set and check accuracy mid‑service. High‑contrast numerals, tick marks at meaningful intervals (every 10–20°C), and anti‑glare finishes all help.
-
Consider back‑printed or engraved markings for longevity; printed ink on the surface is prone to fading from degreaser.
Material matters:
-
Plastic (standard ABS): affordable but can soften or fade under high heat and aggressive chemicals. Acceptable for low‑heat appliances or light duty.
-
Heat‑resistant polymer (e.g., phenolic, glass‑filled nylon, PBT, PPS): the sweet spot for most commercial ovens. These maintain rigidity and finish at elevated temperatures, resist cracking, and insulate the user from heat transfer.
-
Metal (aluminium or stainless steel): durable and smart‑looking, but can conduct heat to the touch and become uncomfortably warm near oven doors or vents. If you choose metal, seek insulated hubs or rubberised grips and ensure the finish resists chemicals used in the kitchen.
In open kitchens, choose knobs that combine professional appearance with high legibility, so chefs and customers alike see a well‑kept operation.
Knobs for Specific Commercial Appliances
Different appliances impose different demands on control knobs. Align the knob’s features with the appliance’s heat, environment, and usage pattern.
Different commercial appliances impose unique demands on their control knobs. Always match the knob’s design and materials to the appliance’s heat level, environment, and usage frequency.
Gas grill control knobs
Gas grills generate intense radiant heat and often operate in semi-open or outdoor areas.
-
High-temperature-rated polymers or metal hubs with insulation to prevent heat soak.
-
Clear “Off” marking visible from a standing distance.
-
Gas grill knobs are UV and weather-resistant for outdoor durability.
-
Grippy, fluted, or knurled textures for safe handling despite grease or humidity.
Heavy-use equipment (fryers, salamanders, pasta boilers)
These units face oil mist, steam, and mineral buildup.
-
Chemical-resistant finishes and sealed caps.
-
Moulded graphics and anti-slip grips for durability and hygiene.
If your appliance is used by multiple teams or in a training kitchen, colour‑coded or icon‑coded knobs reduce the risk of misoperation.
Food warmer control knobs
Appliances such as bain-maries, hot holding cabinets, and carving stations need precision at lower temperatures.
-
Temperature scales (60–95°C) with coloured “Safe Holding” zones for compliance.
-
Soft detents or click stops at service benchmarks (e.g., 63°C in the UK).
-
Smooth, easy-clean surfaces to simplify frequent wiping and sanitation.
-
Brand Compatibility (Lincat, Falcon, Blodgett, Rational, Merrychef, Foster)
Key Factors to Consider When Selecting Control Knobs
A great knob is a blend of fit, feel, visibility, and durability. Use this checklist to avoid the usual pitfalls.
-
Size and diameter: Larger diameters (45–70 mm) enable finer adjustments and better readability; smaller knobs save space but reduce precision.
-
D‑shaft + push‑fit: Quick install, good repeatability if dimensions match closely.
-
Round shaft + set‑screw: Flexible and secure, check that the screw seats on a flat to avoid burrs.
-
Splined shaft + push‑fit: Strong rotational coupling, verify spline count and depth.
-
Collet clamp: Premium, concentric grip with excellent repeatability.
-
Heat resistance: Choose materials rated above the appliance’s peak ambient around the control panel. For ovens and grills, heat‑resistant polymers or insulated metal designs are prudent. Avoid low‑grade plastics that can gloss, warp, or crack.
The Ultimate Guide to Must-Have Small Commercial Kitchen Gear
Maintenance and Replacement Tips: Oven Control Knobs
Well‑chosen knobs still need routine care. A few simple habits will drastically extend service life and accuracy.
Regular inspection:
-
Check weekly for cracks, glazing, or softening, signs of heat or chemical damage.
-
Confirm indicator marks remain legible; if they’re fading, replace them before errors creep in.
-
Wiggle‑test for wobble; play can indicate hub wear or a loosening set‑screw.
Safe replacement steps:
-
Isolate power and/or gas. Allow the appliance to cool fully.
-
support the fascia and pull straight out, avoiding sideways leverage that can damage the thermostat or valve. For set‑screw/collet: loosen the screw(s) fully with the correct driver or hex key.
-
Measure shaft type and length. Confirm D‑flat orientation or spline count.
-
Align the new knob’s pointer at a known mark (e.g., “Off”) and push or tighten evenly. For set screws, seat against the flat and use a dab of medium thread locker if recommended.
-
Test full rotation, detents, and stop positions. Verify flame ignition (gas) and temperature response (thermostat) with the appliance running, following the manufacturer’s procedure.
Cleaning and care:
-
Wipe daily with warm water and a mild detergent, rinse and dry. Avoid scouring pads that abrade markings.
-
Use approved food‑safe degreasers, avoid strong solvents (e.g., acetone) that cloud plastics or lift print.
-
Do not soak knobs while fitted, liquid can track along the spindle into the control body.
How to Address Common Cleaning Challenges in a Commercial Kitchen
Choosing the right control knobs is a small decision with an outsized impact. The correct type, thermostat, gas valve, pointer, or fluted, paired with the right shaft interface and mounting, transforms how precisely your kitchen can set and hold temperatures. Invest in robust, clearly marked, and compatible parts, and your equipment will reward you with consistent performance and safer operation for your kitchen. PartsFe UK offers a wide range of commercial kitchen electrical accessories from trusted manufacturers, such as wiring, cables, switches, outlets, and circuit breakers.
FAQs
How to fix the oven temperature knob that's been snapped off?
To fix a snapped oven temperature knob, pull off the broken knob and check the control shaft. Replace it with a compatible oven temperature control knob that matches your model for accurate heat settings.
Why is my ice control knob stuck in the up position and hard to push down?
An ice control knob stuck in the up position may be due to ice buildup or a jammed lever. Defrost the ice maker and gently move the ice control knob to release it.
How to calibrate an oven knob?
To calibrate an oven knob, compare the set temperature with an oven thermometer. If there’s a difference, adjust the oven temperature knob or recalibrate the control settings following the manufacturer’s guide.