How to Replace a Turbo Air mst-60-24 Door Gasket the Right Way
Is your Turbo Air MST-60-24 running constantly or failing to keep food cold? Before scheduling a costly service call, inspect the door gasket. This magnetic seal takes a beating in busy kitchens. Once it cracks or loses its grip, cold air escapes, forcing your compressor to work overtime and driving up energy bills. Replacing the gasket is a simple fix, but it must be done correctly. A poor installation leads to the same air leaks as a worn-out seal. This blog provides a structured overview of how to inspect, remove, and install a Turbo Air MST-60-24 door gasket, along with practical maintenance insights to maximize equipment performance.
Why Replacing a Turbo Air MST-60-24 Door Gasket Is Essential for Refrigerator Performance
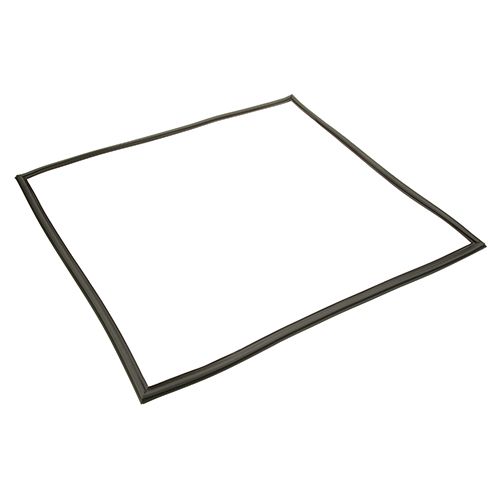
Door gaskets are flexible magnetic seals that create an airtight barrier around refrigerator doors. They prevent warm air from entering the cabinet and help maintain consistent internal temperatures, ensuring efficient operation and food safety. Turbo Air refrigerator door gasket repair ensures these seals perform optimally, preserving efficiency and food safety. Let's take a closer look at how a proper Turbo Air refrigerator door gasket repair preserves efficiency and protects your investment across four key areas.
-
Energy Efficiency: A compromised gasket allows ambient air to enter the cabinet. This forces the compressor to cycle more frequently to maintain set temperatures. Over time, this increases energy consumption and operational costs. Even minor seal gaps can significantly affect efficiency in high-demand commercial kitchens.
-
Temperature Stability: Temperature fluctuation is one of the leading causes of food spoilage. Inconsistent cooling may also violate food safety standards. Replacing a worn Turbo Air door gasket ensures the refrigeration system maintains precise temperature control.
-
Equipment Longevity: Continuous compressor overwork shortens equipment lifespan. Addressing gasket issues promptly reduces mechanical strain and prevents secondary failures such as evaporator icing or motor overheating.
-
Condensation and Ice Prevention: Air leakage leads to moisture intrusion. This can result in frost buildup around the evaporator coil and condensation near the door frame. Timely gasket replacement eliminates these performance concerns.
Explore understanding commercial refrigeration and how it works to learn why seals are critical and how every step of the turbo air cooling cycle works, as shown in the video below
Signs Your Turbo Air MST-60-24 Door Gasket Needs Immediate Replacement
Commercial operators and maintenance personnel should routinely inspect door seals as part of scheduled equipment checks. The following indicators suggest immediate replacement is required.
-
Visible Physical Damage: Cracks, tears, brittleness, or sections pulling away from the door channel indicate structural failure. Even minor splits can allow air leakage under pressure differentials.
-
Deformation or Warping: Over time, exposure to heat, grease, and frequent cleaning chemicals can distort the gasket profile. A warped seal cannot sit flush against the cabinet frame.
-
Reduced Magnetic Grip: Commercial gaskets contain embedded magnetic strips that ensure consistent compression against the cabinet face. If the door no longer “snaps” closed or feels loose, magnetic integrity may be compromised.
-
Persistent Condensation Around the Door Frame: Moisture buildup around the perimeter often signals air infiltration.
-
Failed Dollar Bill Test: Insert a sheet of paper between the door and the cabinet, then close the door. If it slides out easily without resistance, the seal is insufficient.
When any of these conditions are present, scheduling a Turbo Air MST-60-24 commercial ice machine magnetic door gasket replacement should be prioritized to prevent operational inefficiencies.
Shop now at PartsFe UK to keep your refrigeration equipment operating at peak efficiency. We offer a wide selection of high quality ice machine door gaskets, including magnetic door gaskets, retainer strips, flexible rubber gaskets, and insulation strips, helping maintain proper sealing and accurate temperature control in your commercial kitchen.
How to Replace Turbo Air MST-60-24 Door Gasket the Right Way
Proper installation ensures airtight sealing, stable cabinet temperatures, and reduced compressor workload. Follow the correct procedure to maintain long-term performance in commercial refrigeration environments.
-
Confirm Compatibility: Ensure the replacement gasket is specifically designed for the MST-60-24 unit. Commercial refrigeration doors require precise dimensions for proper compression and sealing. Inspect the new gasket for damage, warped corners, or magnetic strip issues before installation.
-
Shut Down the Refrigerator: Power off the unit to prevent compressor strain while the door remains open. In commercial settings, transfer perishable inventory to backup cold storage to maintain temperature compliance during the process.
-
Remove the Old Gasket: Identify whether the gasket is press-fit or secured with a retainer strip. Begin at one corner and pull it out evenly along the perimeter. If screws are present, loosen them slightly and remove the gasket without damaging the retaining channel.
-
Clean Channel: Use a food-safe degreaser to remove grease, debris, and residue from the mounting groove. Pay close attention to corners and screw tracks. A clean, dry surface ensures proper seating and prevents air leakage.
-
Prepare Gasket: Allow the gasket to rest flat at room temperature to eliminate folds from packaging. If needed, use warm water to improve flexibility. Avoid excessive heat, which can damage the embedded magnetic strip.
-
Install Evenly: Start at the top corner and press the gasket firmly into the retaining groove. Work methodically around the door, ensuring consistent seating and square corners. Tighten screws lightly if applicable to avoid distortion.
-
Check Seal: Close the door slowly and inspect for uniform compression along all edges. Adjust hinges if necessary to eliminate gaps. Proper alignment ensures airtight sealing, improved energy efficiency, and stable operating temperatures.
|
Safety Note: Disconnect power before servicing and wear protective gloves to prevent injury. |
Post-Replacement Checks and Maintenance Tips for Long-Lasting Sealing Performance
After installing a new door gasket, performing systematic checks and routine maintenance of your Turbo Air MST-60-24 replacement parts and door gasket is essential to preserve sealing effectiveness and extend its lifespan. Follow these steps to ensure optimal performance:
-
Inspect the Seal: Close the refrigerator door and examine the gasket along the full perimeter. Look for consistent contact between the gasket and the cabinet frame, ensuring no gaps or uneven compression. A uniform seal prevents energy loss and temperature fluctuations.
-
Perform the Dollar Bill Test: Recheck the seal by sliding a sheet of paper between the door and cabinet at multiple points. The paper should resist being pulled out. Repeat the test at corners and along edges to confirm complete coverage.
-
Monitor Temperature Stability: After gasket replacement, verify that internal temperatures remain within recommended ranges. Use a thermometer to ensure the compressor cycles efficiently, and the cabinet maintains consistent cooling.
-
Clean Regularly: Prevent buildup of grease, dust, and debris along the gasket by wiping it down weekly with a mild, food-safe cleaner. Avoid harsh chemicals or abrasive tools that can damage the magnetic strip or flexible material.
-
Check for Wear Signs Periodically: Inspect the gasket monthly for early signs of deformation, cracking, or weakening magnetic grip. Early detection allows proactive replacement before performance is compromised.
-
Adjust Door Hinges if Needed: Over time, heavy usage can cause slight misalignment. Ensure the door closes squarely and evenly presses against the gasket. Loose or misaligned doors reduce sealing efficiency and increase energy consumption.
-
Avoid Excessive Force: When opening and closing the door, avoid slamming or pulling at angles that stress the gasket. Gentle handling helps preserve the magnetic seal and prevents warping or tearing.
-
Maintain Proper Storage Environment: Keep the refrigerator interior organized to prevent overstuffing that could press unevenly against the gasket. Even pressure distribution prolongs seal life and ensures airtight closure.
By following these post-Turbo Air door gasket replacement checks and maintenance tips, your door gasket will maintain optimal performance, ensuring energy efficiency, consistent temperatures, and extended equipment lifespan.
Check out how to troubleshoot Turbo Air refrigerator fan motor problems for quick tips to fix and maintain your fridge fan
Summary: Ensuring Proper Installation of Your Turbo Air MST-60-24 Door Gasket for Maximum Efficiency
Replacing the Turbo Air door gasket correctly is essential for maintaining airtight seals, consistent temperatures, and energy-efficient operation. Proper inspection, careful installation, and routine maintenance prevent air leakage, reduce compressor strain, and extend the life of your commercial refrigerator. Regular checks ensure the gasket remains functional and protects food safety standards. Following these guidelines keeps your refrigeration system performing reliably in high-demand environments.
Key Takeaways:
-
Always confirm gasket compatibility before installation to ensure a proper fit.
-
Shut down the unit and transfer perishables to avoid temperature disruption.
-
Remove the old gasket carefully and clean the channel thoroughly before installing the new one.
-
Press the new gasket evenly into place, checking for gaps and proper magnetic contact.
-
Perform routine inspections and cleaning to maintain seal integrity and energy efficiency.
-
Adjust door alignment and handle doors gently to prevent premature gasket wear.
FAQs
How long does it take to replace a Turbo Air MST-60-24 door gasket?
Replacing the gasket on a Turbo Air mst-60-24 usually takes 20 to 40 minutes. Time may vary based on gasket condition and installation experience.
How to replace the door gasket on a Turbo Air refrigerator?
Unplug the unit, remove the old gasket, and clean the door frame. Fit the new gasket evenly around the door, press it into place, and check for a proper seal. This ensures efficient cooling and energy savings.
How can I ensure the new Turbo Air MST-60-24 door gasket seals correctly after installation?
Make sure the gasket is evenly pressed into the retaining channel on all sides. Close the door and check for gaps using a paper test. If needed, gently warm the gasket to help it settle and create a tight seal.
Why is my Turbo Air MST-60-24 door not sealing properly even after cleaning the gasket?
Poor sealing may result from a warped gasket, misaligned door hinges, or debris in the gasket track. If cleaning does not resolve the issue, inspect for physical damage or replace the gasket to restore proper insulation.
|
Disclaimer: This content is for general informational purposes on replacing Turbo Air MST-60-24 door gaskets. Always follow manufacturer instructions and safety precautions, and consult a certified technician for complex repairs or uncertainties. |