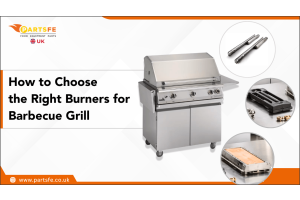
How to Replace a Commercial Griddle Pilot Burner for Optimal Performance
In a commercial kitchen, reliable equipment is paramount. The humble pilot burner within your griddle plays a critical role in ensuring consistent and efficient operation. The burner pilot assembly can eventually wear out or encounter issues, leading to frustrating downtime and inconsistent cooking results. Recognizing the signs of a faulty gas pilot burner is the first step in preventing more significant problems. Common indicators include difficulty igniting the main burners, a flickering or weak pilot flame, or the pilot extinguishing unexpectedly. Proper burner pilot troubleshooting is essential in commercial kitchens to quickly diagnose and address these issues, ensuring your griddle remains a reliable workhorse. This guide will walk you through the process of replacing a commercial griddle's burner pilot assembly, ensuring your equipment operates at peak performance and minimizes disruptions during busy service hours.
What is a Burner Pilot Assembly?
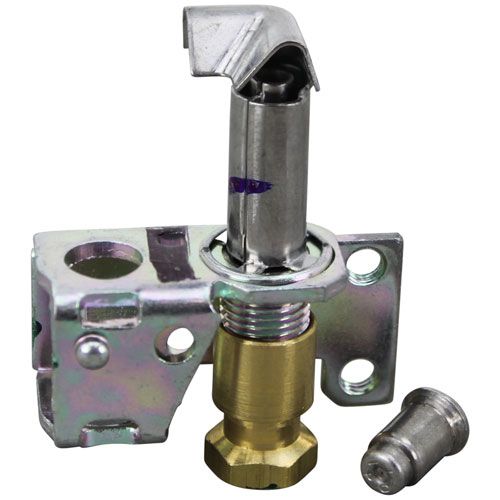
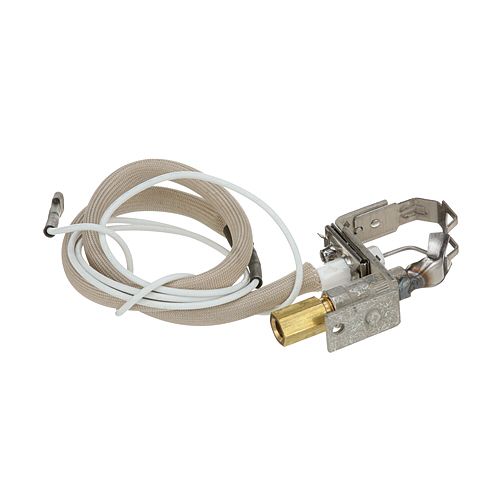
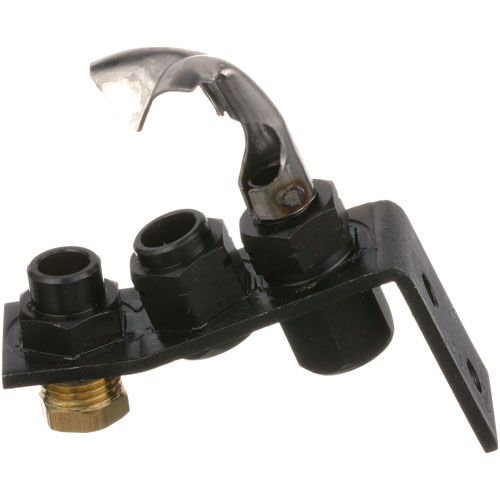
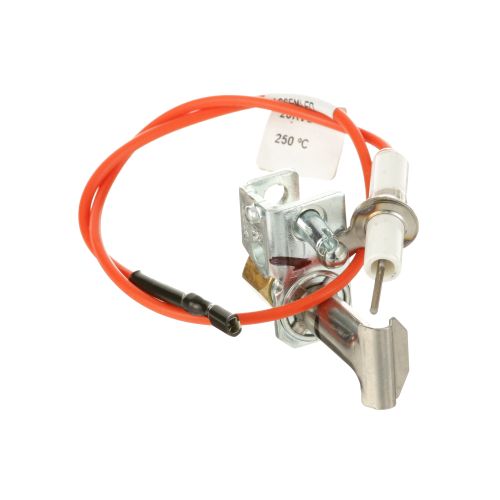
A burner pilot assembly is a small but vital component responsible for the continuous flame that ignites the main burners of your commercial griddle. This assembly is typically located near the main burners and consists of several key griddle parts. These commonly include the pilot orifice, which regulates the gas flow; the pilot tube, which carries the gas to the tip; and the thermocouple or thermopile, a safety device that senses the presence of the pilot flame and allows the main gas valve to open. The Blodgett pilot burner is a well-known type, but many other brands and configurations are used in commercial griddles, each with its nuances in design and function. Understanding the basic components and their roles within the burner pilot assembly is crucial for effective maintenance and replacement.
Common Issues with Gas Pilot Burners
In commercial kitchens, a malfunctioning gas pilot burner can disrupt operations significantly. Identifying and addressing common issues with pilot burners is essential for maintaining efficient griddle performance and kitchen safety
|
Issue |
Cause |
Troubleshooting Tip |
|
Clogged pilot orifice |
|
|
|
Faulty thermocouple |
|
|
|
Weak or yellow pilot flame |
|
|
|
Pilot flame extinguishing |
|
|
|
Gas supply issues |
|
|
|
Misaligned thermocouple |
|
|
|
Loose thermocouple connections |
|
|
Griddle Pilot Burner Replacement Guide
When burner pilot troubleshooting indicates that cleaning isn't sufficient or the burner pilot assembly is simply beyond repair, pilot burner replacement becomes necessary.
-
Before beginning, always ensure the gas supply to the griddle is completely shut off and the appliance has cooled down. Safety should be your top priority.
-
Basic tools for the pilot burner replacement include a wrench or adjustable spanner to disconnect gas lines, screwdrivers to remove panels or mounting screws, and potentially pliers. Having a small brush or compressed air might also help clean the area.
-
Remove the old burner pilot assembly. This typically involves locating the assembly, which is usually near the main burners, and carefully disconnecting the gas line and the thermocouple or thermopile wires. Note how the old assembly is mounted and connected, as this will be helpful during the installation of the new part.
-
Install the new gas pilot burner. Position the new burner pilot assembly in the same location and orientation as the old one. Secure it using the mounting screws or clips. Reconnect the gas line, ensuring a tight and leak-free connection. Reattach the thermocouple or thermopile wires according to the manufacturer's instructions.
-
Make sure the thermocouple tip is positioned correctly within the path of the pilot flame as per the new burner pilot assembly design; incorrect positioning is a common cause of a gas burner pilot not working even after replacement.
-
Once the new burner pilot assembly is installed and all connections are secured, it's time to test for safe and proper ignition. Slowly turn the gas supply back on. Following the griddle's operating instructions, attempt to light the pilot
-
If you detect any gas odor or the pilot doesn't light, immediately shut off the gas supply and recheck all connections. This step is crucial for safety after any pilot burner replacement. Replacing the burner pilot assembly correctly ensures reliable ignition and prevents a gas burner pilot not working issue.
How to Clean a Pilot Burner
Before resorting to pilot burner replacement, sometimes all your gas pilot burner needs is a good cleaning.
-
You should consider cleaning the pilot burner assembly whenever you notice the pilot flame is weak, flickering, or having difficulty staying lit, and after your initial burner pilot troubleshooting points to a potential clog in the pilot orifice.
-
The tools required for cleaning a burner pilot assembly are generally simple: a small, stiff brush, compressed air, or a thin wire or needle to carefully clear the pilot orifice. Always ensure the griddle is off and completely cooled, and the gas supply is shut off before you begin cleaning the burner pilot assembly.
Here’s a step-by-step guide on how to clean a pilot burner:
-
Access the burner pilot assembly. You may need to remove some panels or griddle parts to get to it.
-
Carefully inspect the assembly for visible dirt, grease, or debris.
-
Use the brush to gently clean the exterior of the assembly and the pilot tube. Remove any buildup you see.
-
The most critical part is cleaning the pilot orifice. This is a tiny opening at the end of the pilot tube where the gas exits to form the flame. If you are using a thin wire or needle, carefully insert it into the orifice to dislodge any blockages. Be extremely gentle to avoid damaging the orifice.
-
Alternatively, use compressed air to blow through the pilot tube and orifice to clear any debris. Blow in the direction of the gas flow.
-
Clean the thermocouple as well, ensuring it is free of carbon buildup or other residue that could interfere with its ability to sense the flame.
-
Once cleaning is complete, reassemble any removed panels or griddle parts.
Choosing the Right Griddle Replacement Parts
When pilot burner replacement is necessary, selecting the correct griddle replacement parts is crucial for ensuring compatibility, safety, and optimal performance. There are several factors to consider beyond just the burner pilot assembly itself.
-
Different griddle models and manufacturers use different types of burner pilot assembly units, gas connections, and thermocouples. Trying to force an incompatible part can lead to gas leaks, improper ignition, and potentially dangerous situations. Always consult your griddle's service manual to identify the exact griddle replacement parts specified for your unit. This is especially true for specific components like a Blodgett pilot burner, which may have unique specifications.
-
Quality assurance is another vital consideration when sourcing griddle replacement parts. Cheap, low-quality parts might seem appealing due to their lower price, but they are often less durable, may not function correctly, and could even void your griddle's warranty.
Final Tips and Maintenance Best Practices
Maintaining the optimal performance of your commercial griddle, particularly the burner pilot assembly, involves establishing a routine schedule for checks and adhering to best practices. Don't wait for a gas burner pilot not working situation to arise before you think about maintenance.
-
A regular schedule for checking your burner pilot assembly and other griddle parts is essential. This could be weekly, monthly, or quarterly, depending on the volume of use and the griddle's age.
-
During these checks, visually inspect the pilot flame, examine the burner pilot assembly for any signs of damage or buildup, and check the connections. Also, inspect the main griddle burner parts for clogs or damage.
How to Choose the Gas Solenoid Valve for Commercial Kitchen Equipment
Keeping spare griddle parts on hand can significantly reduce downtime in the event of a failure. Having a spare burner pilot assembly, thermocouple, or even a few common small griddle parts like orifices can allow you to quickly address a gas burner pilot not working issue without waiting for parts to be ordered and delivered. Regular maintenance of all your griddle parts, including knowing how to clean a pilot burner and when to perform a pilot burner replacement, is an investment in the longevity and efficiency of your equipment. PartsFe UK is the preferred selling point for char-broil grill replacement parts and gas grill spare parts. Check out our complete line of OEM parts that can make your commercial cooking appliance work as it should.
FAQs
How does a pilot burner work?
A pilot burner works by producing a small flame that ignites the main gas burner when the appliance is turned on, ensuring safe and efficient ignition.
Do gas grill burners go bad?
Yes, gas grill burners can go bad over time due to rust, grease buildup, or corrosion, leading to uneven heating or burner failure.