
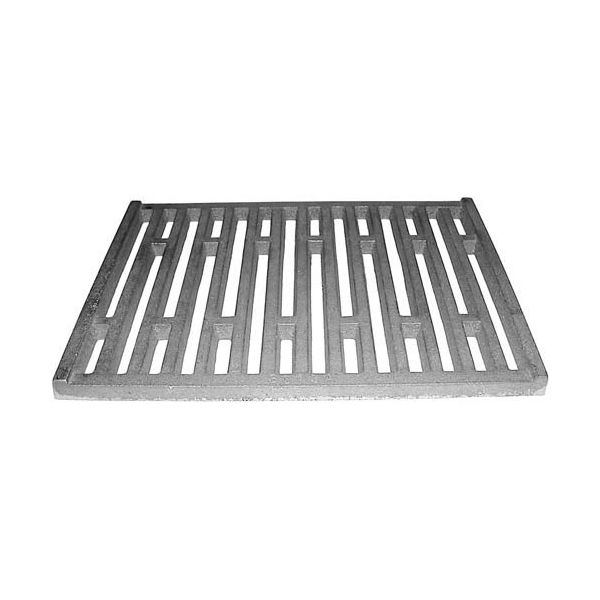
Cecilware S013A Grate 11-3/4" X 8-1/2"

Special Price £21.73 Regular Price £28.21
Out of stock
SKU
S013A
The Cecilware S013A Grate 11 -3/4" X 8 -1/2" is a structural element that is meant to be used in commercial gas burners to provide a stable surface to support the correct distribution of flames and combustion. It is applied in professional kitchens, restaurants, and food service that need high-heat cooking. It will use other components to ensure the proper distance and airflow under cooking surfaces. It allows direct contact with the unit, aiding in even heat exposure and aiding in the maintenance of the correct combustion conditions.

Dimensions

  • Length: 29.845 cm
  • Width: 21.59 cm
  • Height: 2.54 cm
  • Weight: 4.953 kg
https://partsfe.com/media/catalog/product/c/e/cecilware-s013a-grate-11-3-4-x-8-1-2-20247.jpg

Product Notes

  • Cast Iron Bottom Grate
  • [ 11-3/4" X 8-1/2" ] 15 Ribs Across
  • Cecilware Broiler Series Bc. Ccb
CECILWARE:
GRINDMASTER:
Write Your Own Review
You're reviewing:Cecilware S013A Grate 11-3/4" X 8-1/2"
Your Rating
Customer Questions
No Questions

We strive to provide our customers with a hassle-free and efficient shopping experience. Our shipping policy ensures the timely delivery of your orders and complete customer satisfaction. View More

We are committed to ensuring your complete satisfaction with every purchase. We understand that circumstances may arise where you must return a product or request a refund. If for any reason you are not satisfied, you may return the item(s) according to the terms outlined below. View More

This Payment Policy outlines the terms and conditions governing all payments made for products purchased through our website. By making a purchase, you agree to be bound by this Payment Policy. View More

Installation Steps

Step1: Turn off the appliance and allow cooling.

Step2: Remove the damaged or worn grate.

Step3: Clean the mounting surface for a proper fit.

Step4: Place the new grate over the designated area.

Step5: Align edges to match support guides.

Step6: Check that it rests securely and evenly before use.